Tuesday, October 28, 2014

Door Project: progress

Pictures by Sam Osborne

We began repairing the brick door opening on the front door this weekend.  At the beginning of the weekend we were still not sure if the mortar would be sufficiently sticky, or how to make it more sticky, to hold the patch bricks to the existing wall, and we weren't sure how many bricks we would have to remove in order to create a sound opening.  We had also not worked through a strategy to create nailing surfaces.  A lot of uncertainty. 

Our progress in three steps:

1.  Broken bricks, crooked wall, cavities in the wall.


2.  We removed several rotten bricks  as a unit and laid up some tied-together layers.  The mortar stuck.

3.  We moved up and left to demolish and rework another tied-together unit.

We also made our first and second attempt at fashioning a nailing surface. 


Shimming out the nailing block.  Unfinished black walnut, riven timber.  Pulled from the wall and moved to a more suitable spot.

Nailing block to hang the trim in center of view.  Hewn from a discarded tobacco barn timber.

Next weekend we plan to finish the final courses on the same door side and move to the other side of the door opening.  The moment of truth came when the wooden door jamb fit back in the newly snug opening.  Hopefully this trend continues.  It was an exciting time. 

This next weekend will likely be our last full weekend of work on the house.  We may be back up again before the holiday period to do some winterizing and smaller maintenance jobs (or to finish whatever we don't get done next weekend).  Please feel free to leave us a message (here or on facebook) if you want to come visit. 

Thanks for reading. 

(NS)

Monday, October 27, 2014

repairing my foundation (part 5): mixing natural hydraulic lime mortar, ...


This is a video from home builder Colin Moock.  I really like the way he frames his methods and mentality.  He is a home builder and is altering the ideal, in many cases to fit his needs and timelines.  He has posted a repair to his basement in over twenty parts.

Video Resources

This weekend we began construction on the door opening.  Pictures of that operation will be posted later this week, and in the meantime, here are some of the Youtube videos we used to formulate our mortar mixing strategies as well as our re-pointing strategies.  It is our long term goal to establish our own Youtube Channel, where you and future students can watch our methods develop in near-real time.  We would post content like this.  Until then, enjoy our video mentors.

This is the set of recipe ratios we used.  We like this one because it follows the assumptions set forth by Lynch (as mentioned in last week's entry) about the ideal ratio of hydrated lime to sand.  Also, this person is uses super clear vocabulary and demonstration techniques.  We expanded this ratio to pint sized containers--three pints sand, two pints lime.

Here is part one of a video series on brick repair.  Mike Haduck provides some practical tips on brick laying, cutting bricks,  and working with mortar.  He has a large number of straightforward, unboastful, very helpful videos on a number of topics related to masonry and stringed instrument playing.


Here, lime mortar mixing is demonstrated and, there is an interesting discussion on the role of air pockets in calculating total volume of mortar.


We are considering trying to make our own lime putty, particularly for refurbishing the Hall's plasterwork.  This might be a resource.  Here, Gerard Lynch (whom we cited with a video last week) demonstrates.

Thanks for reading and watching,

(NS)

Monday, October 20, 2014

Mortar and Brick Testing

Pictures by T. Westfall, Sam Osborne, and Kathryn Young


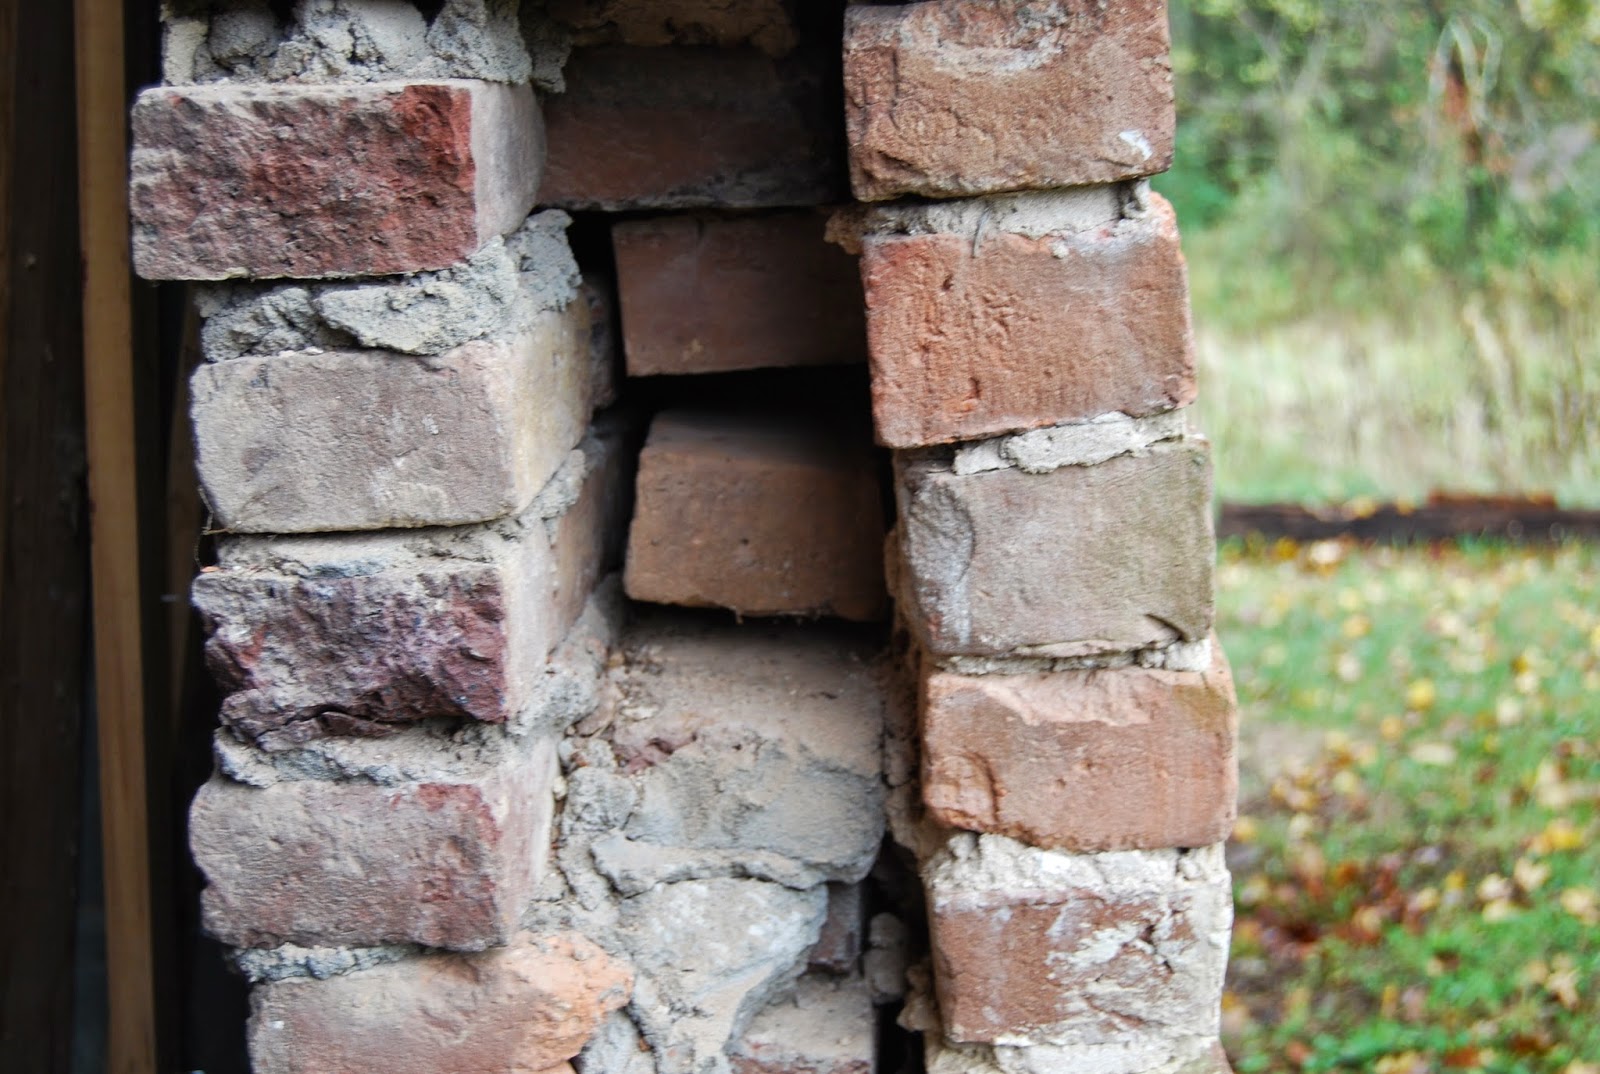
This weekend, we focused on preparing the brick door opening to begin repair next weekend.  We cleaned out chunks of old mortar and broken bricks lying between us and more healthily bonded bricks.


We also scrubbed the dust out with brushes and sponges.  


Graduate Student T. Westfall scrubs some dusty bricks
Graduate Student Kathryn Young scrubbing bricks
We collected samples of each of the four types of mortar we observed on the wall, crushed them into powder and dropped them into a muriatic acid solution, to see what the binding agent was and what the different types of aggregates were.  Below, some aggregate on my fingers. 


Discussing the mortar experiments with Archaeologist Darlene Applegate and Archaeology Research Student Katie O'Grady

We learned that the mortar we are most confident was applied by the owner had small pebbles of unslaked limestone in it, whereas the best restoration match, for color and texture we could find on the wall did not have these unslaked limestone pieces in it. 


Note the small, white flecks, especially in the upper left corner of the picture.  I originally thought they might be Mussel shells, but Dr. Applegate confirmed they were unslaked lime/limestone.
This best match sample also did not have as much total lime as the original.  We know this, because the chemical reaction (fizzing) when the mortar dust hit the acid was much stronger in the “original” mortar.  We also learned that some of the repairs made to the wall, including ones that placed chunks of broken brick out of sequence with the Flemish Bond pattern, and used gobs of mortar to fill broken brick holes in the wall, were made by an owner, using the old formula.  To the right of my finger, you'll see a gob of limestone-flecked mortar.


A second restoration mortar sample was tested, which matched the texture of the first, but not the color.  It also seemed to be heavier on sand and lighter on binder/plasticizer.  It too had less total lime than the “original” mortar.  The fourth total mortar looked to be at least partially comprised of Portland Cement.  


This sample produced the “cloudy” effect on the water characteristic of cement based mortars, but it also bubbled significantly, at a more steady rate, easily as much or more than the more aesthetically pleasing restoration mortars.  We originally thought this was 20th century mortar applied by an occupant, with Portland Cement.  We now think that this was at least related to the mortar recommended to us by a local specialty brickyard, and by a preservation masonry text (Published by the National Preservation Trust), where standard modern mortar ratios are modified with additional sand, and double the lime content.  We tried 1 part Portland Cement, 3 parts Hydrated Lime, 8-10 parts sand. 

Testing some mortar bonds on cheap bricks.  Its a little sandy.
Not only did this experiment teach us that we don’t want to use the brickyard recommended recipe, but it also taught us that some of the most visually problematic mortars on the house were applied in good faith, with an effort to soften the mortar and preserve the building, regardless of who applied them or when. 

We also prepared our materials: we practiced cutting different kinds of bricks to the correct sizes and shapes we’ll need.  We experimented with different types of mason’s chisels, different cutting angles and rhythms, on different types of bricks.  

T. chops up a brick into various pieces.
The shirt helps cushion the impact and prevent spider-cracking.


We practiced mixing mortar in different consistencies and ratios.  We acquired a second type of sand, in addition to our builder’s sand.  It was dug from a riverbed near Bonneyville and was given to us by Biological Preserve Facility Manager, Curtis.  We think it will be superior to our builder’s sand because it will have less air pockets between grains, as well as softer edges, which will make a softer, more workable mortar.  Additionally, as an aggregate, the sand’s color is closer to the original color. 

When we realized the mixture we were preparing to use definitely had the wrong color and might be too strong, we stopped and cleaned up.  It was time to do some research.


Here’s what we found:

According to Brick Mason/Material Culture Scholar Gerard Lynch, in the UK, much of the historically re-worked recipes for lime-based mortar (with or without Portland Cement as a binder) recommend some form of a 1:3 ratio of lime to sand.  This is consistent with what we found in available literature.  He states that this information was culled from journals, letters, ledgers and other primary source documents without an eye to the actual technological process that was used to create hydrated lime (which is what we intended to use).  He states that prior to WWI hydrated lime was delivered to building sites as baked quicklime and “dry slaked” or “hot slaked” on site to avoid having to carry heavy, expanded, wet hydrated lime.  This meant that the 1:3 ratio reflects lime pre-dry-slaking. (Check out Dr. Lynch's videos on Youtube.) During dry-slaking, lime expands 60%-100%.  So, the final product was significantly larger in volume than what has been the general practice in Europe and the US for re-creating historic lime mortars.  This argument is strongly supported by our muriatic acid analysis, where the oldest lime had significantly more lime content as well as incompletely processed limestone pebbles.  

He also recommends using more mature “fat lime putty” as a plasticizer, which we may experiment with in the coming weeks.  

Thanks for reading.  Let me know if you have questions, concerns or want to come help/watch on Saturday.  

(NS)

Tuesday, October 14, 2014

The Project: Measuring the Brick Opening. Pictures by Ashton Ray, Words by Nick Schaedig

1.  Establish Reference Points

Since the Frame and Door fit already, we needed to measure where the door opening is both smallest and true-est.  Sometimes what looks flat is not flat.
2.  Identify Problems and Barriers to further construction

-Uneven mortar.  Will challenge crisp brick laying.  Note the mortar lumps intruding.
-Decomposing wood timbers/nailing surfaces: masons laid wood pieces into the brickwork provided a nailing surface.  Some wood pieces are in great shape.  Some are decomposing, like the one below.

-Unevenly broken bricks, irregular shapes
-Inconsistently applied Flemish Bond wall construction.  Note the pattern on the first three courses, from the upper right corner, down.  We think that is the pattern and the bricks at the center/bottom of the picture are laid out of sequence.  The top bonded bricks are also the true-est.
-The wall is surprisingly not true.  We are not sure if this is consistent across the building, or if this is particular to the damaged and repaired door opening.  

3. Learn about the anatomy of the temporary wooden jamb. (pictures coming soon)
4. Learn more about the anatomy, dimensional challenges regarding, and damages to the door. (pictures coming soon.)

To Do:

1.  Clean bricks:  dirt, messy mortar, irregular wood pieces.
2.  Mix mortar: try different ratios and consistencies
3. Practice cutting and breaking bricks
4. Practice laying bricks away from the house
5. Complete missing photo documentation of the door.
     -Flooring/sill decomposition
     -Damaged door
     -New and old individual brick measurements: do they match?
     -Dimensions of the door timber (appears to be a rough-sawn 4X8)
     -Jamb construction picture
6.  Make a plan to anchor mason string to the concrete sill.  I think using mason screws/nails is not ok, for the sill or for the arch.  Tape?  What do you think?  The string would be in this position:
Thanks for reading this, thanks for being involved.  It should be a fun, challenging, intriguing weekend of problem solving.

(NS)

Sunday, October 12, 2014

Come visit us!


“Places gather things in their midst.  This gathering power extends beyond things to include experiences, histories, and even languages.”  Edward Casey, Philosopher

The Gardner House keeps gathering people and things, stories and ideas, just as it has for 200 years. 
This weekend, (10/18-19/2014) come visit us!  We’ll be cleaning the brick opening for the front door, breaking down and reassembling the front door jamb, and experimenting with mortar and bricks. 

You don’t have to come for a whole day.  You don’t even have to work on the house.  We need help documenting our work, we need help learning about the unique biology in and around the house, and we need to have a good time.  Can you help?  


I’ll be camping out in order to get more work done with less commuting time (and to enjoy the woods).  You’re also welcome to join me.  

Please leave us a message, here or on Facebook if you want to come.  We’d be glad to have you.


Sometimes, we serve the Gardner House by serving the people who serve the Gardner House.   Nick Schaedig and Jon Pace eat some fresh Pecan Rolls.  (Recipe Below)

Pecan Rolls

1 package dry yeast
1 cup warm water
1/4 cup granulated sugar
1 teaspoon salt
4 tablespoons melted butter
1 egg
3 1/4 to 3 1/2 cups flour
1/3 cup Butter
1/2 cup brown sugar
1 tablespoon corn syrup
1 1/4 cup pecan halves
1/2 cup granulated sugar
2 teaspoon freshly ground cinnamon

Directions

In a mixing bowl, dissolve yeast with the warm water. Stir in 1/4 cup sugar, salt, 2 tablespoons butter, egg, and 2 cups flour. Beat until smooth. With spoon or hand, work in enough remaining flour until the dough is easy to handle (if it becomes too sticky, dampen your hands with cold water). Place in a greased bowl. Cover tightly and refrigerate overnight (or, up to 4 to 5 days).

Divide the pecan halves into two piles: two thirds, one third.  Combine 1/3 cup melted butter, brown sugar, corn syrup and two thirds of the pecan halves. Finely chop the remaining third of the pecan halves.  Pour into greased oblong 9 by 13-inch pan. Combine 1/2 cup sugar, and fresh ground cinnamon (sifted to take out the chunks) and chopped pecans. On floured board, roll out the dough into about a 9 by 15-inch shape. Spread remaining two Tbsp melted butter on the dough.  Spread sugar, pecans and cinnamon mix over the buttered dough. Begin rolling the dough up tightly starting with the long side. Seal the edges when the dough is rolled. Cut into 1-inch slices and place in the 9 by 13-inch prepared pan. Cover with a damp cloth and let rise in a warm place until double in size (about 1 1/2 hours). Bake in a preheated 375 degree oven for 25 to 30 minutes. Remove from the oven and IMMEDIATELY turn upside down onto a platter.

When I made these, I forgot that I usually mix this recipe (which is already a combination of three recipes) with another that uses warm milk to proof the yeast and calls for rubbing brown sugar instead of table sugar on the inside of the rolls.  I think these changes would yield more flavor, but a little more fuss too.  I always mix my flour and yeast THEN mix in the salt and fats to prevent the yeast from touching the salt directly, which would kill at least some of the yeast. 

I used “Grandma Blair’s Caramel Pecan Rolls” recipe from the Food Network, my Mother’s “Sticky Buns” recipe, and Rose Levy Beranbaum’s “Caramel Pecan Rolls” recipe for structure, ingredients and inspiration.  Syncretism and phenomenology is my Grandma Dorothy Schaedig’s secret to keeping recipes secret.

(NS)

Monday, September 29, 2014

10th Anniversary

The Gardner House celebrated its 10th anniversary as an active historic preservation lab and interpretive museum site this past weekend.  Thank you to everyone who helped to make this event possible and to everyone who helped make it so much fun.

One of the coolest things about the Gardner House is that everyone sees something different when they look at it.  Our pictures are full of people pointing to things, looking at things, and discussing.


Some people see it and want to talk right away.  And others have questions.


 And others decide to take it all in first.

A lot of our visitors, at one point or another strike this pose:


For everyone, its different.  Maybe its the shoes.
Or handmade doors with hand forged hardware.  For a lot of folks its the Black Walnut reeding in the windows and on the mantle.  Something stops us.  And we need to consider.

Is it surprise?  Affirmation?  But when people see the house, and when they reach that point when they need to stop and consider, something special is happening.  Something that can't happen without touching, smelling, feeling the history.

The house has brought people together for 200 years.  We have a lot to learn.  If you haven't had the chance to make the trip, take another look at that calendar.  We would love to host you.

(NS)

Thursday, September 25, 2014

Projects

We're working on three types of projects

1.  Structural Restoration--Some aspects of the house are not weather-tight and are essential components of the long-term health of the building.

  • Repairing the Front Door, Door Opening, and Jamb.  The opening is not symmetrical, the jamb is not sealed to the opening and the structure of the historic replica door has been damaged.

  • The back door needs a more structurally sound porch.  This porch will include an accessibility ramp and ground-anchored rail.  (picture coming soon)
2.  Maintenance--Houses degrade over time, lived in or not.  Several projects we completed years ago need some maintenance in order for those jobs to stay "done."
  • The gutters need to be cleaned out so that rainwater can drain away from the house and its foundation and original floor joists. [DONE]

  • The roof cap is not water tight.  Some of the cap shingles have blown off in the wind and the flashing has pulled away from the chimney.  (picture coming soon)
  • The Hall Chimney cap needs to be put back into place and secured with weights. [DONE]
  • Some of the window panes need to be replaced and re-glazed. [DONE]
3.  Cosmetic/Structural Restoration--Many of the house's components are in various stages of deterioration and in need of refurbishment.  
  • The Parlor's ceiling, walls, and wood trim need to be painted.  [DONE]
  • The Parlor needs trim to be hung joining the ceiling and the walls.  [DONE]
  • The floors in the Hall and Parlor need to be resurfaced. (picture coming soon)
  • The fireplaces in the Hall and Parlor need to be resurfaced and repainted.  The Hall fireplace also needs some bricks replaced.  (picture coming soon)
  • The front porch can be assembled from hand-mixed mortar and the stones lying in the front yard.
     
  • The interior plaster, wood trim, and ceiling in the Hall need to be repaired and resurfaced as in the Parlor. (picture coming soon)
(NS)

Tuesday, September 23, 2014

Capacity

Jess Holler worked for two hours, building sawhorses at the Gardner House a few weekends ago. Building sawhorses was not on the list of chores we needed to complete in order to have the parlor room ready for the 10 year anniversary open house this weekend. 

But because of those two hours of work, we were able to paint all the trim wood for the Parlor, and paint more of it, because it could dry outdoors and all at once.


And because of that work John was able to glue and nail the trim pieces together into a finished unit in an efficient manner.


And because Carl saw us doing woodwork on sawhorses, he asked if we could use a workbench, and if he could build us one.


Because Jess volunteered to work two hours on some saw horses, the trim got painted, and assembled, and Carl had an idea.

We have more tools to do more work and more people that want to do it.  And that's what capacity is all about.  Thanks Jess, thanks Carl, John--thanks team.


(NS)


Community Open House

Thanks for stopping by the Gardner Historic House blog! If you'd like to visit the actual house, now's your chance.

The Gardner House will be open to the public THIS SATURDAY, September 27, 2014 from 9:00am to 3:00pm. SEE YOU THERE! For more information, go to
or

We look forward to seeing you there!