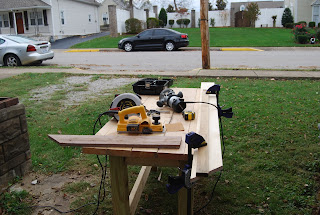
1. First, I had to make a miter sled. I sawed solid wood shims and glued them as "runners" to the bottom of a sheet of plywood. Then I sawed halfway through the sled, and mounted the plywood beams I built to the sled top, at exactly 90 degrees with respect to each other, and at 45 degrees with respect to the saw kerf now in the center of the sled.
 |
| Special thanks to Charles Hurst and Kristina Arnold for his "gravity clamp" innovation. Also, thanks to Chester Cornett (I actually saw it in MOJ before I heard Charles name it). |
Then, I had to figure out how to create a fence for my router and determine the depth of cut on some scrap pieces.
2. Then, I used an angle grinder to cut and grind the bricks flush to one another, so trim can be layed smoothly overtop of them.
I also used the angle grinder to cut away some of the old plaster that was too thick, and too near the doorway on the inside.
This plaster will be replaced in the spring by yours truly. It was a dirty job.
3. Then, I could rout and joint the trim boards and try to mount them to the wall. Do you remember that totally crooked, assymetrical header beam that is holding all the bricks above the door up? Well, here is the crooked shim board I cut and planed in order to get my trim boards to lie flush against it.
And, voila! The door is now permanently part of the wall, and the gaps have been sealed.
The next step is figuring out how to mount the decorative reeded panel that will inlay in inside of the door jamb, making it, and mounting it into the jamb. I have transported rough-sawn boards back to my shop/apartment in BG to work on/develop this from home. When its 80% done, I'll try to put it in. That will likely happen after exam week.
This was a big week. Thanks for reading.
NS


This comment has been removed by the author.
ReplyDelete